Project Showcase
Current Car Audio
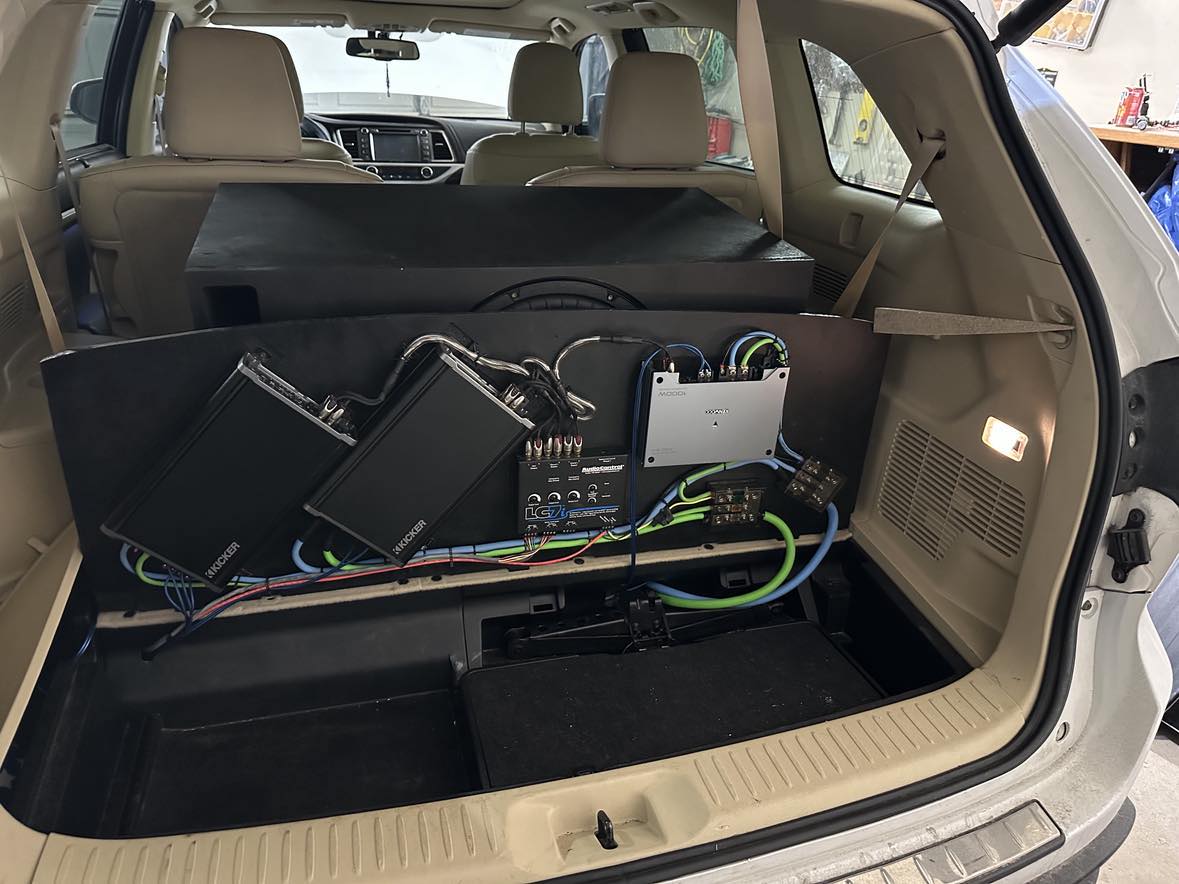
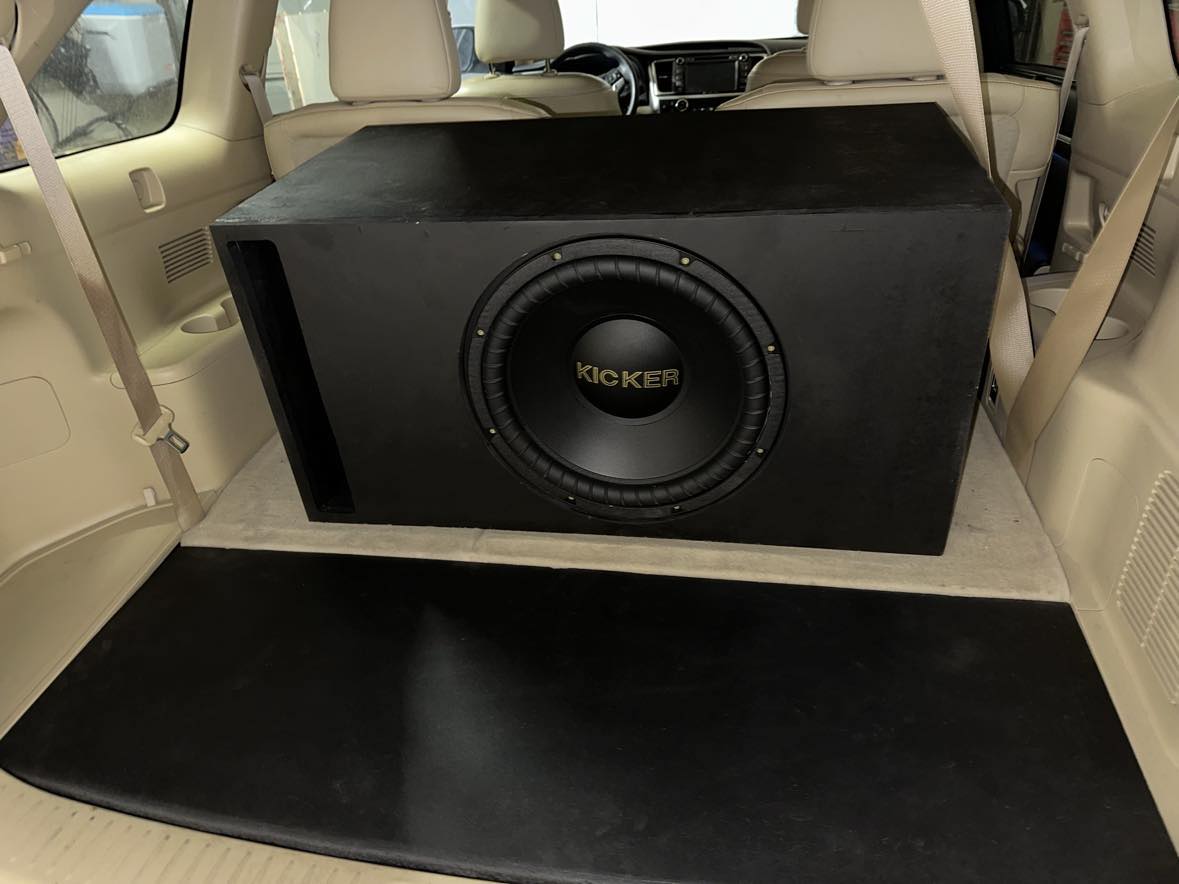
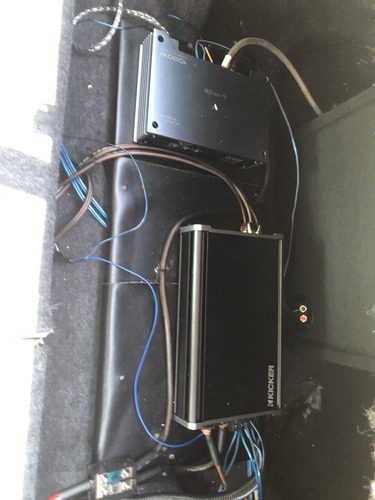
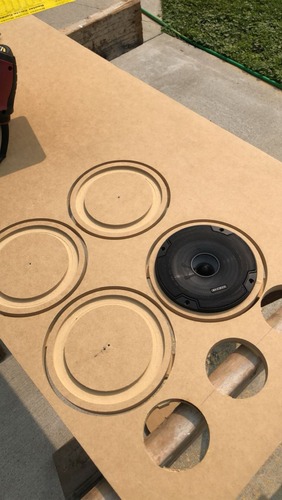
If you cant tell yet, you will soon find out that I love speakers and building awesome speaker systems. It is probably my favorite hobby. This is my biggest and best yet. I pulled the front speakers and replaced those with some Kicker speakers I had. I also pulled the factory sub and replaced that with a massive 15" Kicker in a custom encolsure that I built myself. The speakers I pulled will be used for another project. The new Kicker gear is all powered off of two Kicker amps. You can see a third amp wired onto the board ready to go. That is incase I want some space back. I can remove the big 15" sub and replace it with a 12" sub powered off of this other amp. I had the space on the amp board and this design makes it plug and play with no extra tuning. The amp board itself is a replica of the plastic board that comes factory with the vehicle. I simply remade it out of particle board, recessed the gear into it as needed, then painted it black. Last but not least, I am using an AudioControl LC7I line output converter to retain my factory head unit and split the RCA signals to the appropriate amps.
This Website
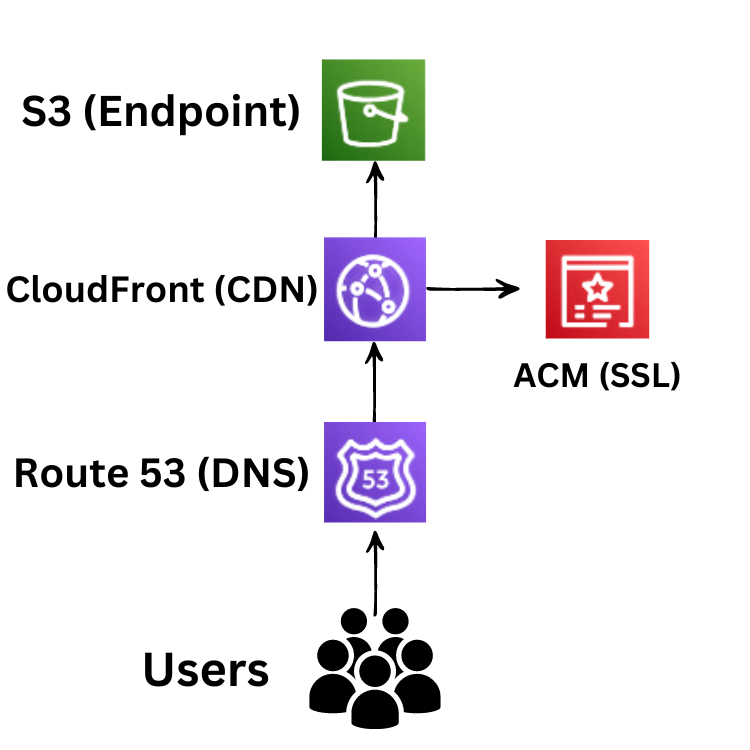
I have been wanting to turn my resume into a website for awhile, but never felt the project was right until I could code it myself. Then I found myself in a Web Design class where we learned HTML and CSS. This is where I learned just about everything I needed to make this site. So I finally did. Everything you see here I wrote in Notepad++ with HTML and CSS. Everything but the slideshows on this page. That would be some Javascript I sourced from W3 Schools. Every other interactive element on this site I wrote in CSS. I had fun making the site, but realized quickly I have little interest in web development beyond this. So why not put what I learned in my Cloud Admin class to use and turn this into a Cloud project? That's why I decided to host the site using AWS. This has given me some better, hands on experience working with AWS and in the Cloud. My website content resides as an endpoint in a S3 Bucket. Users query Route 53 for DNS resolution to my site where CloudFront will cache and deliver the content from S3 to the user all the while being secured using SSL certificates managed by AWS Certificate Manager. Check out a quick visual I made of the cloud architecture in the slideshow.


Home Server
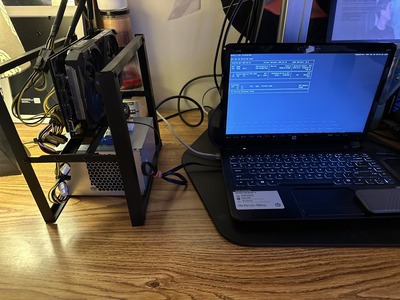
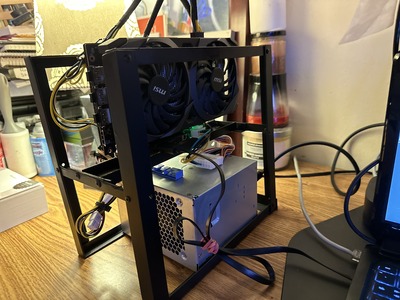
I was learning a ton about servers in school and wanted one for myself. I had an old HP laptop from about 2012 that I figured would get the job done. I wiped Windows and installed Ubuntu Server, something I played around with in my Linux classes. I considered something like Windows Server or ClearOS, really anything with a GUI, but I wanted to challenge myself to a command-line only project of my own. It has proven to be the best way for me to learn Linux. I set up the machine with a static IP address that I set aside for it in my router settings. From there I enabled SSH so I can access it from my main machine. After that I got to installing services. I started with Samba so I can share files through Windows File Explorer and use the server as a file backup. After that I installed Wireguard and set up the machine as a VPN server. To do this I needed to use a DDNS site to forward my IP to a website that stays static under a domain I created. This is because my routers IP changes but I need something static to host VPN services without making constant changes. I also installed an Adblocker with PiHole. The next step for me and my new server was installing Jellyfin and configuring that so I can share media from the server This included creating directories and adding my media to them. What media you ask? I have a bunch of TV and Movies saved to a USB-C SSD. I plugged that into the laptop and mounted it to the directories I created for Jellyfin (& SMB). Once I get more storage I will setup a RAID 1 configuration for redundancy. Everything was great until I tried to watch a 4k movie and realized the 2012 laptop was not quite cut out for the task. Some research led me to the Graphics card laptop adapter you see in the pictures to the left. It's just a mini PCIe to PCIe adapter. I removed the wifi card and installed this, running the cable in between two existing ports. I found a GTX GeForce 3050 on Facebook marketplace for a great deal. My dad had some old desktops and he let me rip the power supply unit out of one. The GPU I got needed some more juice and had an 8 pin connector on top. Two SATA to 6 pin adapters + One double 6 pin to 8 pin adapter later, then fans started spinning. Installing the Nvidia drivers was a nightmare through the command line and I almost switched my whole operating system until I finally got it working. Then, I told Jellyfin to use the GPU for transcoding and now we're watching 4k content. I plan to add more services once I get better hardware.
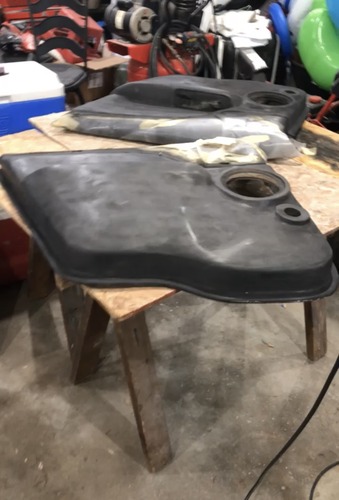
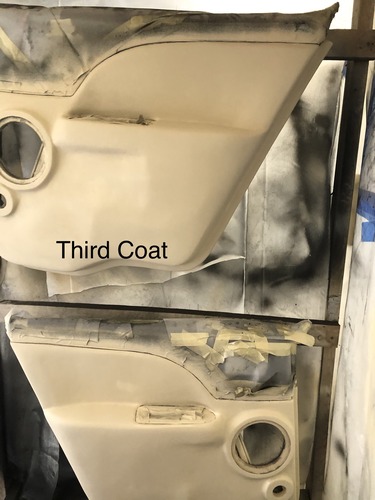
Old Car Audio Builds
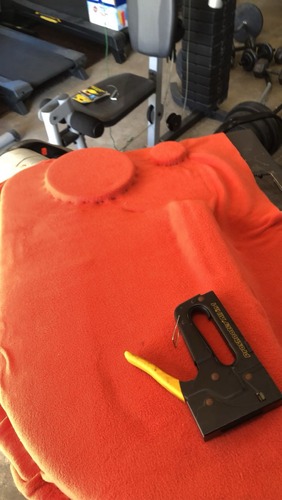
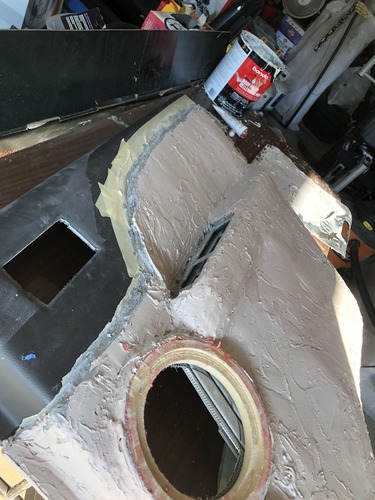
I've put a subwoofer in pretty much every vehicle I've ever had. I don't have pictures of a lot, and a couple of my first builds I have none. I had a ton of fun each time and learned a lot. This would be my first real time running any wires and learning about interferance, impedance, amplifiers, and the proper way to connect it all. I even got into fabrication a bit by making some custom door panels and speaker pods out of fiberglass and bondo. That was a real learning curve and I am far from being able to call myself a pro at any bodywork, but that's okay. I learned the process and now everytime I get a filling from my dentist I cant help but picture him patching a rusty hole in a car. My first car audio build was in my very first car with the help of my older brother. It was all equipment from him and he was able to show me the basics. My first solo build was in my next vehicle, my old Ford Taurus. I installed an aftermarket head unit and wired up a 12" Kenwood Subwoofer to a new Kenwood Amp. Unforunately, I have no pictures of that build like this, but it sounded great. Like any audiophile, I soon wanted more. I got a great deal on some Kicker equipment and decided to upgrade all 4 door speakers to some high powered component speakers from Kicker and wired it to an amp from them too. These speakers sounded good... too good. Now I needed more bass. Out with the 12" Kenwood and in with two 12" JBL subs along with a JBL amp to match. Somewhere along the way I install some sound deadening mat throughout a substaintial portion of the vehicle. I wish I had pictures of that. I didn't like the original door panels I made and tried a different strategy for mounting the speakers by creating pods instead. These looked much better and held up great. I also got a chance to redo the amp board when swapping amps and cleaned up the wiring a bit too.